
30-Watt/120-Volt Corded Soldering Iron Kit with LED Halo Ring
- Solder skillfully and confidently with Weller’s 30-Watt Soldering Iron with LED Halo Ring. with its 360° illumination, ergonomic molded pencil grip handle, easy-to-change tips and integrated safety rest, it’s the perfect high-quality and versatile soldering iron for all your soldering needs. This comes with a full range of tip designs – conical, chisel or screwdriver – perfect for intricate soldering applications.
- Highlights
- 360° illumination provides focused, bright light ensuring high-quality solder joints
- Ergonomic molded pencil grip provides you with comfort, precision and control
- Easily replace worn tips or change tip applications
- Full range of tip designs – conical, chisel or screwdriver – perfect for intricate soldering applications
- On-board safety rest holds iron when not in use, reducing the risk of injury or damage to your workspace
$20.56

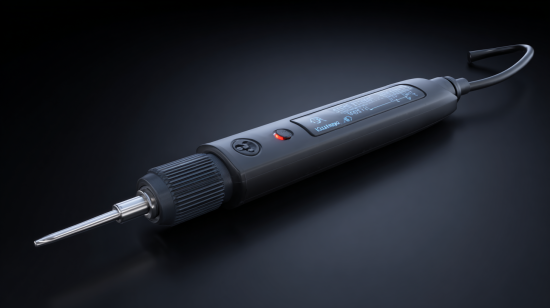
M12 12-Volt Lithium-Ion Cordless Soldering Iron (Tool-Only)
- The M12 Soldering Iron delivers fast application speeds by reaching operational temperature in under 18 seconds and maintaining an optimized temperature throughout the most demanding applications. The heat indicator utilizes REDLINK INTELLEGENCE to notify users when the tool is ready-to-use and safe-to-store, eliminating the guesswork. The 3-stop pivoting head provides unmatched access by allowing users the ability to adapt the tool for the application and solder in more confined spaces. The M12 Soldering Iron powered by REDLITHIUM battery technology delivers up to 40 minutes of run-time on a M12 Compact Battery Pack.
- Highlights
- Green LED Indicates Operating Temperature Reached
- Red LED Indicates Tool is Off and Still Hot
- 3-Stop Pivoting Head: Delivers Unmatched Access
- Tool-Free Tip Change: Easily Switch Between Chisel and Pointed Tips
- LED Work Light
- Compatible with all M12 Battery Packs
- It includes (1) M12 Soldering Iron (Tool Only) (2488-20). (1) Chisel Tip, (1) Pointed Tip
$119.00

25-Watt/120-Volt Corded Woodburning Soldering Iron Kit (15-Piece)
- The Weller WLIWBK2512A 15-piece Woodburning Project Kit inspires creativity with everything you need to begin your journey as a woodburning hobbyist. The Weller Short-Barrel Woodburning Iron’s reduced tip-to-grip distance allows for improved accuracy and precision, and can be used on a variety of woods and leather. This kit comes with a wide variety of tips for all your woodburning project needs, whether for burning, cutting, branding, or embossing.
- Highlights
- 15-piece set includes woodburning iron with 1-soldering, 3-branding, and 6-woodburning tips
- Improved comfort and operator safety ensured with stay-cool handle
- Improved accuracy in tasks with reduced tip-to-grip distance
- Deflects heat away from your hand, allowing a comfortable woodburning experience
- On-board rest holds iron when not in use, reducing the risk of injury or damage to your workspace
- Easily replace worn tips or change tip applications
- Ideal for both woodworking and leather embossing
- Wide variety of tips for all your woodburning project needs whether for burning, cutting, branding, or embossing
$18.87

67-Watt Temperature Adjustable Soldering Iron
- The Hakko FX-601 is an “electronic” variable closed-loop temperature controlled soldering iron. A dial on the hand piece makes it fast and easy to adjust the temperature you want and need when you need it. The FX-601 has an extra-long power cord, which is ideal for soldering applications that require mobility and/or a long reach, such as soldering solar panels. And the extremely lightweight and ergonomic hand piece allows you to solder for long periods of time without hand fatigue.
- Highlights
- Temperature range: 464 – 1004° F
- Ceramic heating element
- Temperature control sensor in heater ensures consistent heat
- Efficient heating means less wattage needed
- Fast thermal recovery
- Lightweight (only 2.4 oz. without cord)
- 3-wire power cord
- UL/CSA approved
$75.77

80-Watt Corded Soldering Iron with LED Halo Ring
- Solder securely and firmly with Weller’s 80-Watt Soldering Iron with Power Grip. Equipped with its ergonomic handle for comfortable and continuous soldering, easy-to-change tips and integrated safety rest. It’s the perfect high-quality and versatile soldering iron for all your soldering needs.
- Highlights
- 360° illumination provides focused, bright light ensuring high-quality solder joints
- Ergonomic molded pencil grip provides you with comfort, precision and control
- Easily replace worn tips or change tip applications
- Full range of ti
$24.32
Everything You Need to Know Before Making Your First (or Next) Purchase
I’ll never forget the first time I held a soldering iron. It was like being handed a magic wand that could permanently bond metals together with nothing but heat and a thin wire of alloy. That was fifteen years ago, and since then, I’ve burned through more soldering tips than I care to count, melted my fair share of components, and learned some hard lessons about what makes a truly great soldering iron.
If you’re reading this, chances are you’re standing at the same crossroads I once faced: staring at dozens of soldering iron options online or in the electronics store, wondering which one will serve you best without breaking the bank. Maybe you’re a complete beginner who doesn’t even know where to start, or perhaps you’re an experienced maker looking to upgrade your trusty old iron that’s been faithfully serving you for years.
The truth is, choosing the right soldering iron isn’t just about picking the cheapest option or the one with the most features plastered on the box. It’s about understanding your specific needs, your skill level, and the types of projects you’ll be tackling. A $15 iron from the hardware store might seem like a bargain, but I learned the hard way that it can actually cost you more in frustration, ruined projects, and replacement components than investing in quality from the start.
What Exactly is a Soldering Iron Used For?
Before we dive into the nitty-gritty of buying guide for soldering iron considerations, let’s establish what this tool actually does and why you might need one. At its core, a soldering iron is a heated tool designed to melt solder – a low-melting-point alloy that acts as a permanent adhesive between metal surfaces.
In my workshop, I use soldering irons for an incredibly diverse range of projects. The most obvious application is electronics work: connecting components to circuit boards, repairing broken traces, or assembling custom electronic devices. I’ve soldered everything from tiny surface-mount components that require a magnifying glass to see clearly, to massive power connectors that need serious heat to make a proper joint.
But electronics is just the beginning. I’ve used soldering irons for jewelry making, creating delicate silver chains and repairing broken clasps. The precise heat control makes it perfect for working with precious metals without the risk of damage that comes with larger torches. Stained glass artists swear by soldering irons for joining glass pieces with lead came, and I’ve even seen craftspeople use them for wood burning and leather work.
The key is understanding that different applications require different types of soldering irons. The iron I use for delicate surface-mount work on a smartphone motherboard is completely different from the hefty iron I reach for when soldering thick copper wires in an automotive application.
How Does a Soldering Iron Actually Work?
Understanding the mechanics behind your soldering iron will help you make a much more informed purchase decision. At its heart, every soldering iron consists of a few basic components: a heating element, a tip (or bit), a handle, and some form of temperature control – though this last part varies dramatically between models.
The heating element is typically a resistive coil wrapped around a ceramic or metal core. When electricity flows through this coil, resistance generates heat, just like in a toaster or electric heater. This heat is then conducted through the iron’s tip, which is usually made of copper plated with iron or nickel to prevent corrosion.
The magic happens in the thermal management. Cheap irons often struggle with temperature recovery – the ability to quickly return to operating temperature after making a solder joint. When you touch the tip to a large ground plane on a circuit board, that mass of copper can suck heat away from your iron faster than it can replenish it. This is where the wattage rating becomes crucial, but more on that later.
Modern soldering stations take this concept further by incorporating feedback systems. A temperature sensor in the tip constantly monitors the actual temperature and adjusts the power delivery to maintain your set temperature. It’s like cruise control for your soldering iron, and once you’ve experienced it, going back to a basic iron feels like driving a car without power steering.
What Makes the Best Soldering Iron for Beginners?
After teaching countless friends and family members how to solder, I’ve developed some strong opinions about what beginners actually need versus what they think they need. The best beginner soldering iron isn’t necessarily the cheapest or the most feature-packed – it’s the one that will help you develop good soldering habits while being forgiving of mistakes.
Temperature control is absolutely non-negotiable for beginners. I cannot stress this enough. Those basic irons that just plug into the wall and heat up to whatever temperature they feel like are recipe for disaster. Without temperature control, you’ll either work too cold (creating weak, unreliable joints) or too hot (damaging components and lifting circuit board traces). A good entry-level temperature-controlled iron will typically run you between $40-80, and it’s worth every penny.
Wattage matters, but not in the way most people think. You might assume that more watts equals better performance, but for beginners working on typical electronics projects, anything between 25-40 watts is perfect. The key is having enough thermal mass to maintain temperature during use without so much power that you accidentally damage delicate components.
I always recommend starting with a pencil-style iron rather than a gun-style iron. Pencil irons offer much better control and precision, which is essential when you’re learning proper technique. Gun-style irons have their place, but that place isn’t in the hands of someone just starting out.
Look for an iron that comes with multiple tip sizes. A chisel tip around 2-3mm wide is perfect for most through-hole components, while a smaller conical tip will serve you well for finer work. Having options means you won’t outgrow your first iron quite as quickly.
Understanding the Different Types of Soldering Irons
The soldering iron market offers more variety than most people realize, and understanding these different types is crucial for making the right purchase decision. Let me walk you through the main categories I’ve encountered in my years of soldering.
Basic plug-in irons are the most straightforward type – you plug them in, they heat up, and you solder. While I generally steer beginners away from these due to their lack of temperature control, they do have their place. For very occasional use or in situations where portability is paramount, a quality basic iron can suffice. Just don’t expect the precision and consistency you’ll get from more advanced models.
Temperature-controlled irons represent the sweet spot for most users. These incorporate some form of temperature regulation, though the sophistication varies widely. Some use simple bimetallic switches, while others employ more precise electronic controls. The investment in temperature control pays dividends in consistent results and component safety.
Soldering stations take temperature control to the next level by separating the control electronics from the iron itself. This allows for more precise temperature management, digital displays, and often additional features like adjustable power settings. I’ve found that the separation also tends to make the iron handle lighter and more comfortable for extended use sessions.
Hot air stations combine a traditional soldering iron with a hot air gun, making them ideal for surface-mount work and component removal. While not strictly necessary for beginners, they become invaluable as you advance to more complex projects involving modern electronics.
Cordless irons have come a long way in recent years. Modern battery-powered irons can deliver surprising performance and heat-up times that rival corded models. The freedom from cords makes them excellent for field repairs or working in spaces where power access is limited. However, battery life remains a consideration for extended projects.
Specialized irons serve specific niches. I have a heavy-duty iron for stained glass work that delivers much more heat than any electronics iron, and a precision micro iron for working on smartphone repairs where even a standard electronics iron would be too large.
Safety First: How to Use a Soldering Iron Without Burning Down Your Workshop
Safety might not be the most exciting topic, but I’ve seen enough preventable accidents to know it deserves serious attention. Proper safety practices aren’t just about avoiding injury – they’re about creating an environment where you can focus on your work without worry.
The most obvious hazard is the hot tip, which can easily reach 400-800°F depending on your settings. I learned this lesson the hard way when I absentmindedly reached for my iron by the tip instead of the handle. The result was a perfectly iron-shaped burn on my thumb that took weeks to heal properly. Always assume your iron is hot, even if you think you turned it off. Use a proper iron stand that holds the iron securely and keeps the tip away from your work surface and your body.
Ventilation is often overlooked but critically important. Soldering produces fumes that you definitely don’t want to breathe regularly. The flux in solder contains chemicals that can irritate your respiratory system, and some older solders contain lead, which poses additional health risks. I invested in a small fume extractor fan for my workbench, and it was one of the best purchases I’ve made. If a dedicated fume extractor isn’t in your budget, at least ensure you’re working in a well-ventilated area.
Fire safety deserves special mention. Soldering irons are, by definition, hot enough to ignite many common materials. Keep your work area clear of flammable materials, and always have a way to quickly extinguish small fires. I keep a small fire extinguisher rated for electrical fires within easy reach of my soldering station.
Eye protection becomes important when working with small components or in situations where solder might splatter. I’ve had molten solder pop unexpectedly more times than I care to count, and safety glasses have saved my vision on multiple occasions.
Temperature Control: Getting the Heat Just Right
Temperature control is perhaps the most critical factor in achieving consistent, reliable solder joints. After years of experimentation, I’ve developed some strong preferences for temperature settings based on the type of work I’m doing.
For most electronics work with standard 60/40 or 63/37 tin-lead solder, I set my iron to around 350-375°F (175-190°C). This provides enough heat to create good flow and wetting without risking damage to heat-sensitive components. Lead-free solders require higher temperatures, typically 25-50°F higher than their leaded counterparts, due to their higher melting points.
The key is finding the sweet spot where your solder flows readily but you’re not applying excess heat to your components. Too low, and you’ll create cold solder joints that look dull and are mechanically weak. Too high, and you risk lifting circuit board traces, damaging components, or creating brittle joints due to overheating.
Component size also influences temperature selection. Large components and thick wires act as heat sinks, drawing heat away from your iron tip. For these situations, I’ll bump my temperature up by 25-50°F to compensate. Conversely, tiny surface-mount components require careful temperature management to avoid damage.
I’ve learned to recognize the signs of proper temperature through the solder’s behavior. Good solder should flow smoothly and wet surfaces readily without excessive bubbling or smoking. If your solder balls up and refuses to flow, your temperature is too low. If it spatters and smokes excessively, you’re running too hot.
Mastering the Art of Wire Soldering
Wire soldering might seem straightforward, but there’s definitely a right way and several wrong ways to approach it. The difference between a professional-looking joint and an amateur mess often comes down to preparation and technique rather than expensive equipment.
Preparation is absolutely crucial for successful wire joints. I always start by stripping the wire insulation cleanly, leaving just enough bare conductor exposed for the joint. Too little, and you won’t have enough surface area for a strong connection. Too much, and you risk short circuits or mechanical stress on the insulation.
Tinning your wires before making the final joint is a game-changer. This involves applying a thin coat of solder to each wire individually before joining them together. Tinned wires join much more easily and create stronger, more reliable connections. The process also helps you identify any wires with contamination or poor solderability before you’re committed to the final joint.
For joining two wires, I prefer the Western Union splice for its mechanical strength. This involves twisting the wires together before soldering, creating a joint that’s strong even without the solder. The solder then provides the electrical connection and environmental protection.
Heat management becomes critical with wire joints. Wires conduct heat along their length, so you need to work quickly once everything reaches temperature. I heat the joint, not the solder, allowing the wire temperature to melt the solder rather than trying to drip molten solder onto a cold joint.
Soldering Stations vs. Simple Irons: Is the Upgrade Worth It?
This question comes up constantly in maker forums and electronics groups, and my answer has evolved over the years. For anyone doing more than occasional hobby work, a soldering station represents a significant upgrade in capability and user experience.
The primary advantage of a soldering station is precise temperature control. Instead of relying on the thermal characteristics of the iron itself to regulate temperature, a station uses active feedback control to maintain your set temperature within a few degrees. This consistency translates directly to better solder joints and fewer damaged components.
Stations also typically offer faster heat-up times and better thermal recovery. When you’re working on a large ground plane that sucks heat away from your tip, a good station will detect the temperature drop and automatically increase power to compensate. This means you can work more efficiently without waiting for your iron to catch up.
The ergonomics are often superior as well. Since all the control electronics are in the base station, the iron handle can be lighter and more comfortable for extended use. Many stations also offer interchangeable tips and handles, allowing you to customize your setup for different types of work.
However, stations do come with drawbacks. They’re more expensive, take up more bench space, and are less portable than simple irons. For someone who solders occasionally or primarily works on simple through-hole components, a quality temperature-controlled iron might be all they ever need.
I typically recommend starting with a good temperature-controlled iron and upgrading to a station when you find yourself pushing the limits of what the iron can do. By that point, you’ll have developed enough experience to appreciate the station’s advantages and make an informed decision about which features matter most for your work.
Keeping Your Tips in Top Condition
Proper tip maintenance is probably the most overlooked aspect of soldering, yet it has a dramatic impact on your results. I’ve seen people blame their iron for poor performance when the real culprit was a neglected, oxidized tip that couldn’t transfer heat effectively.
The enemy of soldering tips is oxidation. When your tip heats up in the presence of air, the iron plating begins to oxidize, forming a layer that doesn’t wet well with solder and transfers heat poorly. This is why you should always keep a small amount of solder on your tip when it’s hot – the solder acts as a protective coating that prevents oxidation.
I clean my tips regularly during use with a damp sponge or brass wool. The sponge method works well but can cause thermal shock if the sponge is too wet. Brass wool has become my preferred method because it cleans effectively without the temperature cycling that can stress your tip over time.
For tips that have become heavily oxidized, tip tinner is a lifesaver. This mildly abrasive compound can restore even badly neglected tips to like-new condition. However, prevention is always better than cure – maintaining your tips properly from the start will extend their life significantly.
Temperature also plays a role in tip longevity. Running your iron hotter than necessary will accelerate tip wear and oxidation. I make it a habit to turn down my temperature when I’m not actively soldering, and I always clean and tin my tip before shutting down for the day.
Choosing the Right Solder for Your Iron
The solder you choose is just as important as the iron itself, and different applications call for different solder compositions. Over the years, I’ve accumulated quite a collection of different solders, each optimized for specific types of work.
For general electronics work, I still prefer 63/37 tin-lead solder in a 0.6-0.8mm diameter. This eutectic composition melts and solidifies at the same temperature, eliminating the “plastic” phase that can cause joint movement during cooling. The lead content makes it flow beautifully and create bright, shiny joints that are easy to inspect visually.
However, lead-free solders have become increasingly important, especially for commercial products that must comply with RoHS regulations. SAC305 (tin-silver-copper) is my go-to lead-free solder, though it requires higher temperatures and doesn’t flow quite as nicely as leaded solder. The learning curve is steeper with lead-free solders, but they’re necessary for many applications.
Flux core is essential for most soldering applications. The flux cleans oxidation from the joint surfaces and helps the solder wet properly. Rosin flux is traditional and works well for most electronics applications, while no-clean flux formulations eliminate the need for post-soldering cleaning in many cases.
Diameter matters more than most people realize. Thick solder works well for large joints but makes it difficult to control the amount applied to small components. I keep several diameters on hand: 0.6mm for general work, 0.4mm for fine-pitch components, and 1.0mm for larger connections.
Selecting the Perfect Iron for Electronics Work
Electronics work places unique demands on a soldering iron that differ significantly from other applications. The components are often heat-sensitive, the joints are small and precise, and the consequences of overheating can be expensive.
For modern electronics, temperature control isn’t optional – it’s essential. Modern integrated circuits can be damaged by temperatures that were perfectly acceptable for older, more robust components. A good electronics iron should offer precise temperature control with quick recovery and minimal overshoot.
Tip selection becomes critical for electronics work. I use chisel tips for most through-hole work because they offer good heat transfer and control. For surface-mount components, I switch to smaller conical or knife-edge tips that can access tight spaces without disturbing adjacent components.
ESD protection is often overlooked but increasingly important. Static electricity can damage sensitive components even before you apply heat. Many modern soldering stations include ESD protection, grounding both the iron and your workpiece to prevent static discharge.
The iron’s response time matters when working with temperature-sensitive components. You want an iron that heats up quickly, maintains stable temperature during use, and allows you to work efficiently without dwelling on any one component longer than necessary.
For SMD (surface-mount device) work, consider irons with very fine tips and excellent temperature stability. The small thermal mass of SMD components means they heat up quickly, and precise temperature control prevents overheating that can damage the component or lift pads from the circuit board.
Can You Really Use a Soldering Iron for Jewelry Making?
This question surprised me when I first encountered it, but after trying jewelry soldering myself, I can definitively say yes – with important caveats. Soldering irons can absolutely be used for jewelry making, but the requirements are quite different from electronics work.
Jewelry soldering typically involves precious metals like silver, gold, and copper, which have different thermal properties than the materials used in electronics. Silver, in particular, conducts heat extremely well, which means you need an iron with excellent thermal recovery to maintain temperature when working with larger pieces.
The solder used in jewelry is also different. Instead of the low-temperature tin-based solders used in electronics, jewelry work often uses silver solder or gold solder that melts at much higher temperatures. This means your iron needs to be capable of reaching and maintaining temperatures of 500-700°F or higher.
Tip selection becomes crucial for jewelry work. The tips need to be suitable for the higher temperatures and shouldn’t contaminate the precious metals. Many jewelers prefer dedicated jewelry soldering irons or small torches for this reason.
I’ve found that smaller jewelry pieces work well with a quality electronics iron, especially for repair work like reattaching findings or fixing broken chains. For larger pieces or when working with thick silver stock, a dedicated jewelry soldering iron or torch becomes necessary.
The precision control that makes electronics irons great for circuit work also translates well to detailed jewelry assembly. The ability to apply heat exactly where you need it without affecting surrounding areas is valuable when working with delicate gemstone settings or intricate metalwork.
Troubleshooting: When Your Iron Won’t Heat Up
Nothing is more frustrating than a soldering iron that won’t heat up when you have work to do. Over the years, I’ve encountered most of the common failure modes and learned how to diagnose and fix many of them.
The most common issue is simply a burned-out heating element. Like any resistive heating device, soldering iron elements have a finite lifespan. Signs of element failure include complete lack of heating, slow heat-up times, or inability to reach proper operating temperature. Unfortunately, element replacement often costs nearly as much as a new iron, making replacement the practical choice for most budget and mid-range irons.
Connection problems are another frequent culprit. The constant heating and cooling cycles can cause solder joints inside the iron to crack, or connections to corrode. If your iron heats intermittently or seems to have a loose connection, this is likely the issue. Some brave souls attempt repairs, but given the safety implications of working with line voltage, I usually recommend replacement unless you’re very comfortable with electrical work.
Temperature sensor failures can cause irons to overheat, underheat, or display erratic temperature readings. Modern temperature-controlled irons rely on accurate sensor feedback, and sensor failure can render the iron unusable or dangerous. Again, repair costs often exceed replacement costs for consumer-grade equipment.
Power supply issues can masquerade as iron problems. Before concluding your iron is dead, test it with a known-good power source or multimeter. I’ve seen several “broken” irons that were actually suffering from power supply failures.
For cordless irons, battery issues are common. Lithium-ion batteries have limited charge cycles and gradually lose capacity over time. If your cordless iron won’t hold a charge or heats poorly, battery replacement might restore it to like-new performance.
Corded vs. Cordless: Freedom vs. Reliability
The choice between corded and cordless soldering irons involves trade-offs that go beyond simple convenience. Having used both extensively, I can share insights into when each type makes sense.
Corded irons offer unlimited runtime and generally more consistent performance. They’re not limited by battery capacity and can maintain full power throughout extended work sessions. For bench work where mobility isn’t a concern, corded irons typically offer better value and performance per dollar spent.
Modern cordless irons have closed the performance gap significantly. High-quality cordless models can match the heat-up time and temperature stability of corded irons, at least for the duration of their battery life. The freedom from cords makes them excellent for field repairs, automotive work, or any situation where power access is limited.
Battery technology has been the limiting factor for cordless irons, but recent advances have improved the situation dramatically. Lithium-ion batteries now provide respectable runtime while maintaining consistent power output throughout the discharge cycle. Some high-end cordless irons can run for hours on a single charge.
Heat-up time used to favor corded irons significantly, but modern cordless designs have largely eliminated this advantage. Quality cordless irons can reach operating temperature in 15-30 seconds, which is competitive with most corded models.
The main drawbacks of cordless irons remain battery life and the gradual performance degradation as batteries age. For occasional use, these limitations are easily managed, but heavy daily use might favor corded models simply for their unlimited runtime and consistent performance over years of use.
Common Soldering Problems and How to Avoid Them
Even experienced solderers encounter problems, but recognizing and addressing common issues quickly can save time and prevent component damage. Let me share the most frequent problems I’ve encountered and how to solve them.
Cold solder joints are probably the most common issue, especially for beginners. These joints look dull and granular rather than bright and smooth, and they’re mechanically weak and electrically unreliable. The cause is usually insufficient heat – either temperature too low or not enough time for the joint to reach proper temperature. The solution is ensuring your iron is hot enough and allowing sufficient time for heat transfer.
Solder bridges between adjacent pins or traces are another frequent problem, especially when working with fine-pitch components. Prevention is easier than cure – use appropriate solder wire diameter, proper flux, and don’t apply too much solder. If bridges do occur, solder wick or desoldering braid can remove excess solder effectively.
Overheated components manifest as lifted pads, damaged traces, or component failure. This usually results from temperatures that are too high or dwelling too long in one spot. The solution involves proper temperature control and developing efficient technique that minimizes heat exposure time.
Contaminated joints can result from dirty surfaces, old flux, or contaminated solder. Always start with clean surfaces, use fresh flux when needed, and store your solder properly to prevent contamination. Isopropyl alcohol and fine abrasives can clean joint surfaces when necessary.
Poor wetting, where solder balls up instead of flowing smoothly, usually indicates temperature issues or contamination. Ensuring proper surface preparation and using adequate flux usually resolves wetting problems. Sometimes older components have oxidized leads that require gentle abrasion to expose clean metal.
The Art of Desoldering: Removing Components Safely
Desoldering is often more challenging than soldering, especially when you need to preserve the component or circuit board. I’ve developed techniques over the years that minimize damage and make component removal much more predictable.
The key to successful desoldering is heating all joint connections simultaneously while providing a way for the molten solder to escape. For through-hole components with multiple leads, this often means heating one joint at a time while gently wiggling the component to break it free gradually.
Desoldering braid (solder wick) is my go-to tool for removing excess solder. This copper braid draws molten solder away from joints through capillary action, leaving clean pads ready for new components. The trick is applying flux to the braid and heating the braid, not the joint directly.
For components with many pins, desoldering pumps or vacuum desoldering tools can be lifesavers. These tools suck molten solder away from joints, clearing holes and freeing component leads. Manual pumps work adequately for occasional use, while electric vacuum stations excel for production work.
Hot air desoldering works exceptionally well for surface-mount components. The heated air melts all solder joints simultaneously, allowing the entire component to be lifted free. This technique requires practice to avoid overheating adjacent components, but it’s incredibly efficient once mastered.
Low-melting-point alloys can make desoldering easier in some situations. These alloys lower the melting point of existing solder joints, making them easier to work with using standard tools. However, they can contaminate your regular solder if not cleaned thoroughly afterward.
Circuit Board Soldering: Precision and Technique
Working on circuit boards demands precision and technique that differs from general electrical work. The traces are often delicate, the components are densely packed, and there’s little room for error.
Surface preparation becomes critical when working with circuit boards. Oxidized pads or traces won’t wet properly with solder, leading to unreliable joints. Light abrasion with fine sandpaper or a fiberglass pen can restore solderability to old or corroded boards.
Component placement accuracy matters more on circuit boards than in point-to-point wiring. Misaligned components can stress traces, create short circuits, or make the board mechanically unstable. I always dry-fit components before applying any solder to ensure proper alignment and fit.
Heat management becomes crucial when working on multi-layer boards. Large ground planes and power planes act as heat sinks, drawing heat away from your joints. Internal layers can also be damaged by excessive heat, creating failures that aren’t immediately apparent.
Flux application technique affects joint quality significantly. Too little flux results in poor wetting and unreliable joints, while too much can cause spatter and require extensive cleaning. I prefer flux pens for precise application on circuit board work.
Component orientation matters for both function and thermal management. Heat-sensitive components should be oriented to minimize heat exposure from adjacent hot components, and polarized components must be oriented correctly to prevent damage or malfunction.
When Your Tip Needs Replacement: Signs and Solutions
Soldering iron tips don’t last forever, and recognizing when replacement is necessary can save significant frustration. I’ve learned to read the signs that indicate when a tip has reached the end of its useful life.
The most obvious sign is a tip that won’t tin properly. When fresh solder won’t stick to the tip surface, oxidation has usually progressed beyond what cleaning can fix. This manifests as solder that balls up and rolls off the tip rather than forming a smooth, bright coating.
Physical damage is another clear indicator for replacement. Tips that are pitted, corroded, or have lost their plating won’t transfer heat effectively and can contaminate your solder joints. Sometimes tip damage results from overheating, aggressive cleaning, or accidental contact with hard surfaces.
Poor heat transfer is a subtler sign that often gets overlooked. If you find yourself turning up the temperature to compensate for sluggish heating, your tip might be the culprit rather than your iron. The thermal interface between tip and heating element can degrade over time, reducing efficiency.
Tip replacement isn’t always straightforward. Some irons use proprietary tips that are expensive or hard to find, while others use standard sizes that are readily available. This is worth considering when choosing an iron – tips are consumables, and long-term operating costs include regular tip replacement.
Proper tip storage can significantly extend tip life. I always clean and tin my tips before shutting down, and I store irons in stands that protect the tips from mechanical damage. Some people prefer to remove tips entirely for long-term storage, which prevents corrosion in the tip-to-heater interface.
Safety Precautions: Beyond the Obvious
Soldering safety extends well beyond avoiding burns, though that’s certainly important. Years of workshop experience have taught me to think about safety holistically, considering both immediate hazards and long-term health effects.
Fume management deserves serious attention. The flux in solder produces irritating vapors, and lead-based solders pose additional health risks. While occasional exposure isn’t likely to cause problems, regular soldering without proper ventilation can lead to respiratory issues and metal exposure concerns.
Fire safety becomes critical when working with flammable materials. Soldering iron temperatures are well above the ignition point of many common materials, including paper, plastic, and some fabrics. I keep my work area clear of unnecessary flammable materials and always have appropriate fire suppression nearby.
Eye protection matters more than many people realize. Molten solder can spatter unexpectedly, especially when working with contaminated surfaces or when flux boils vigorously. Safety glasses have saved my vision more than once when unexpected spatter occurred.
Electrical safety shouldn’t be overlooked, especially when working on powered circuits. While most hobby soldering involves unpowered circuits, there are times when hot soldering is necessary. Understanding electrical safety principles and using appropriate isolation techniques prevents electrocution and protects your equipment.
Workspace organization contributes significantly to safety. A cluttered bench increases the likelihood of accidents, while proper tool organization ensures you can work efficiently without reaching across hot surfaces or knocking over equipment.
Budget Considerations: What Does Quality Cost?
The question of how much to spend on a soldering iron doesn’t have a simple answer. The right amount depends on your intended use, skill level, and long-term plans for the hobby or profession.
For absolute beginners who want to try soldering without a major investment, quality temperature-controlled irons start around $30-40. These entry-level options won’t have all the features of professional equipment, but they’ll provide adequate performance for learning and light hobby use. Spending less than this typically means sacrificing temperature control, which I consider essential even for beginners.
The sweet spot for serious hobbyists seems to fall in the $60-120 range. This budget allows for genuine temperature control, decent build quality, and features like interchangeable tips and reasonable warranty coverage. Irons in this range should provide years of reliable service for typical hobby electronics work.
Professional-grade equipment starts around $150-200 and can easily exceed $500 for high-end stations. These tools offer features like precise temperature control, fast heat-up times, multiple channels, and robust construction designed for daily use. The question is whether these features justify the cost for your intended use.
Total cost of ownership includes more than just the initial purchase. Factor in replacement tips, stands, accessories, and consumables like solder and flux. A $30 iron that uses expensive proprietary tips might cost more long-term than a $60 iron with readily available tips.
Consider your growth trajectory when budgeting. If you’re likely to advance to more demanding projects, buying a iron you’ll outgrow quickly might be false economy. Sometimes spending a bit more initially saves money compared to upgrading later.
My Final Recommendations
After fifteen years of melting solder and occasionally my workbench, I’ve developed some strong opinions about what makes a truly useful soldering iron. The perfect iron doesn’t exist, but understanding your needs and choosing accordingly will serve you well.
For absolute beginners, I recommend starting with a quality temperature-controlled iron in the $40-60 range. This provides essential features without overwhelming complexity or cost. Brands like Weller, Hakko, and X-Tronic offer excellent options in this category that will serve beginners well and remain useful even as skills advance.
Serious hobbyists should consider stepping up to a proper soldering station. The improved temperature control, faster heat-up times, and better ergonomics make a noticeable difference in both results and user experience. Expect to spend $80-150 for a station that will handle most hobby electronics work with ease.
For professional use or advanced hobbyists working on demanding projects, high-end stations justify their cost through superior performance and reliability. Features like multiple channels, advanced temperature control, and robust construction become important when your livelihood depends on your tools.
Don’t forget about accessories in your budget planning. A good iron stand, quality solder, flux, and basic hand tools are essential for successful soldering. These items often cost as much as the iron itself but are equally important for good results.
Most importantly, buy from reputable suppliers and choose brands with good customer support. Soldering irons are tools that you’ll use for years, and having access to replacement parts and technical support makes a significant difference in long-term satisfaction.
The journey from soldering novice to competent practitioner is rewarding but requires patience and practice. Starting with quality tools that won’t fight you every step of the way makes that journey much more enjoyable and successful. Whether you’re repairing electronics, creating art, or building the next great gadget, the right soldering iron will serve as a faithful companion for years to come.
Remember, the best soldering iron is the one that matches your needs, fits your budget, and encourages you to keep practicing and improving your skills. Choose wisely, practice safely, and enjoy the satisfaction that comes from making permanent, reliable connections that will stand the test of time.